
Send push notifications
There are two ways to send push notifications: from the backoffice, for one-off campaigns, and from the API, for automated sends from your own systems. This guide explains sending immediately from the backoffice.
To send, you need a template with the notification’s content. If it does not exist yet, see create a notification.
Send a notification
Section titled “Send a notification”In the app’s Notifications tab, click Send now. The wizard has three steps: Template, Audience and Confirm. Next is not enabled until the current step is complete.
1. Template
Section titled “1. Template”Choose the notification you want to send. If it does not exist yet, create it with Create notification. Once selected it is shown read-only; to change it without touching the original, click Duplicate to edit and then Save & use.
2. Audience
Section titled “2. Audience”In Send to you choose who receives the notification: every user, or some of them by zone, country, language, operating system, access dates or location, or a specific list of devices. Each type and its settings are explained in audience types.
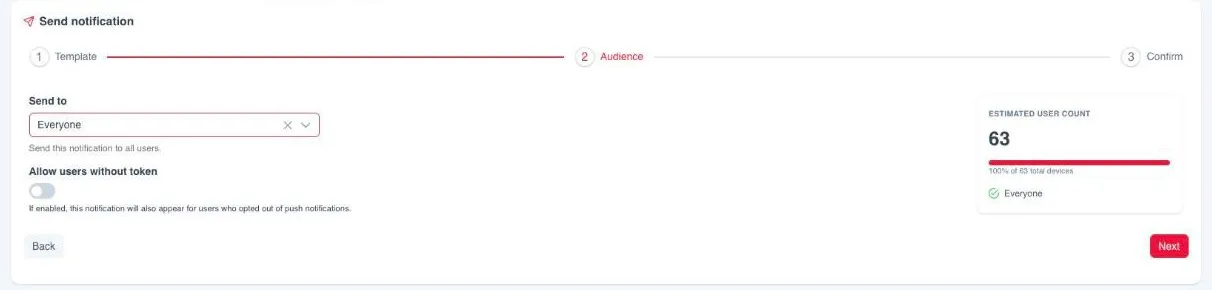
The Estimated user count panel updates with every change and shows how many devices match the audience and what percentage of the total they represent. It counts devices with push notifications enabled, not people.
3. Confirm
Section titled “3. Confirm”The screen summarises the trigger, which here is Immediately, the template, what happens when the notification is tapped and the audience, together with the Estimated recipients.
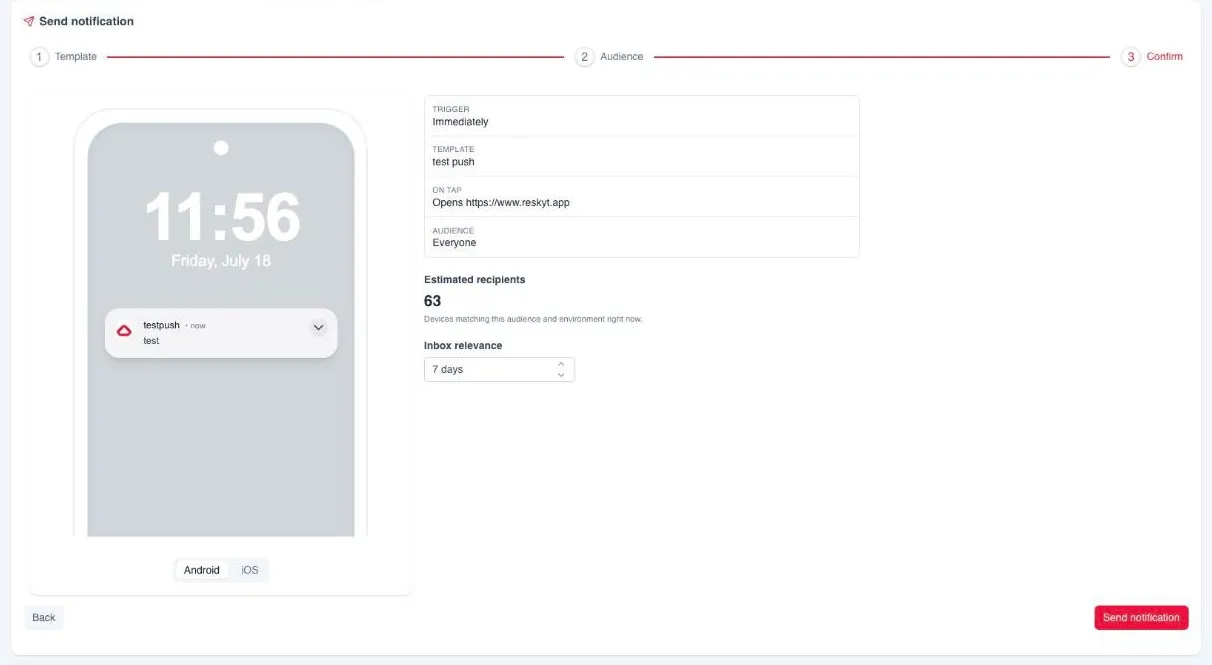
Two things are set here:
| Setting | What it is |
|---|---|
| Inbox relevance | How many days the notification stays visible in the app’s notification inbox. Between 1 and 60 days, 7 by default. |
| Environment | Only in apps with more than one environment. Which environment receives the send; production by default. It does not appear with the device list audiences or the test audience. |
To send, click Send notification. The send goes out at that moment and cannot be undone. Afterwards, the backoffice opens All deliveries, where you can follow its progress. See send history.
From the API
Section titled “From the API”To send from your systems, for example from a CRM, the API receives the list of
recipients in deviceId. It is each device’s hashed installation ID, obtained in
the app with window.ReskytLayout.device.getId(). The usual pattern is to store
it in your CRM together with the customer ID when the user logs in to the app.
The full flow is in the push API reference.
Best practices
Section titled “Best practices”Notifications expire. If dateEnd is not specified, the API applies an expiry
of 7 days from the send.
Send frequency affects the retention of the device base: a high volume of notifications can increase both permission opt-outs and app uninstalls.
If a notification does not arrive, the order of checks is in push troubleshooting.