
Create a notification
Before sending a push notification you have to create its template: the text, the image and where it leads when tapped, in each of the app’s languages. The same template can be sent immediately, scheduled or used in an automation as many times as needed.
Templates are in the app’s Notifications tab. To create one, click Create notification.
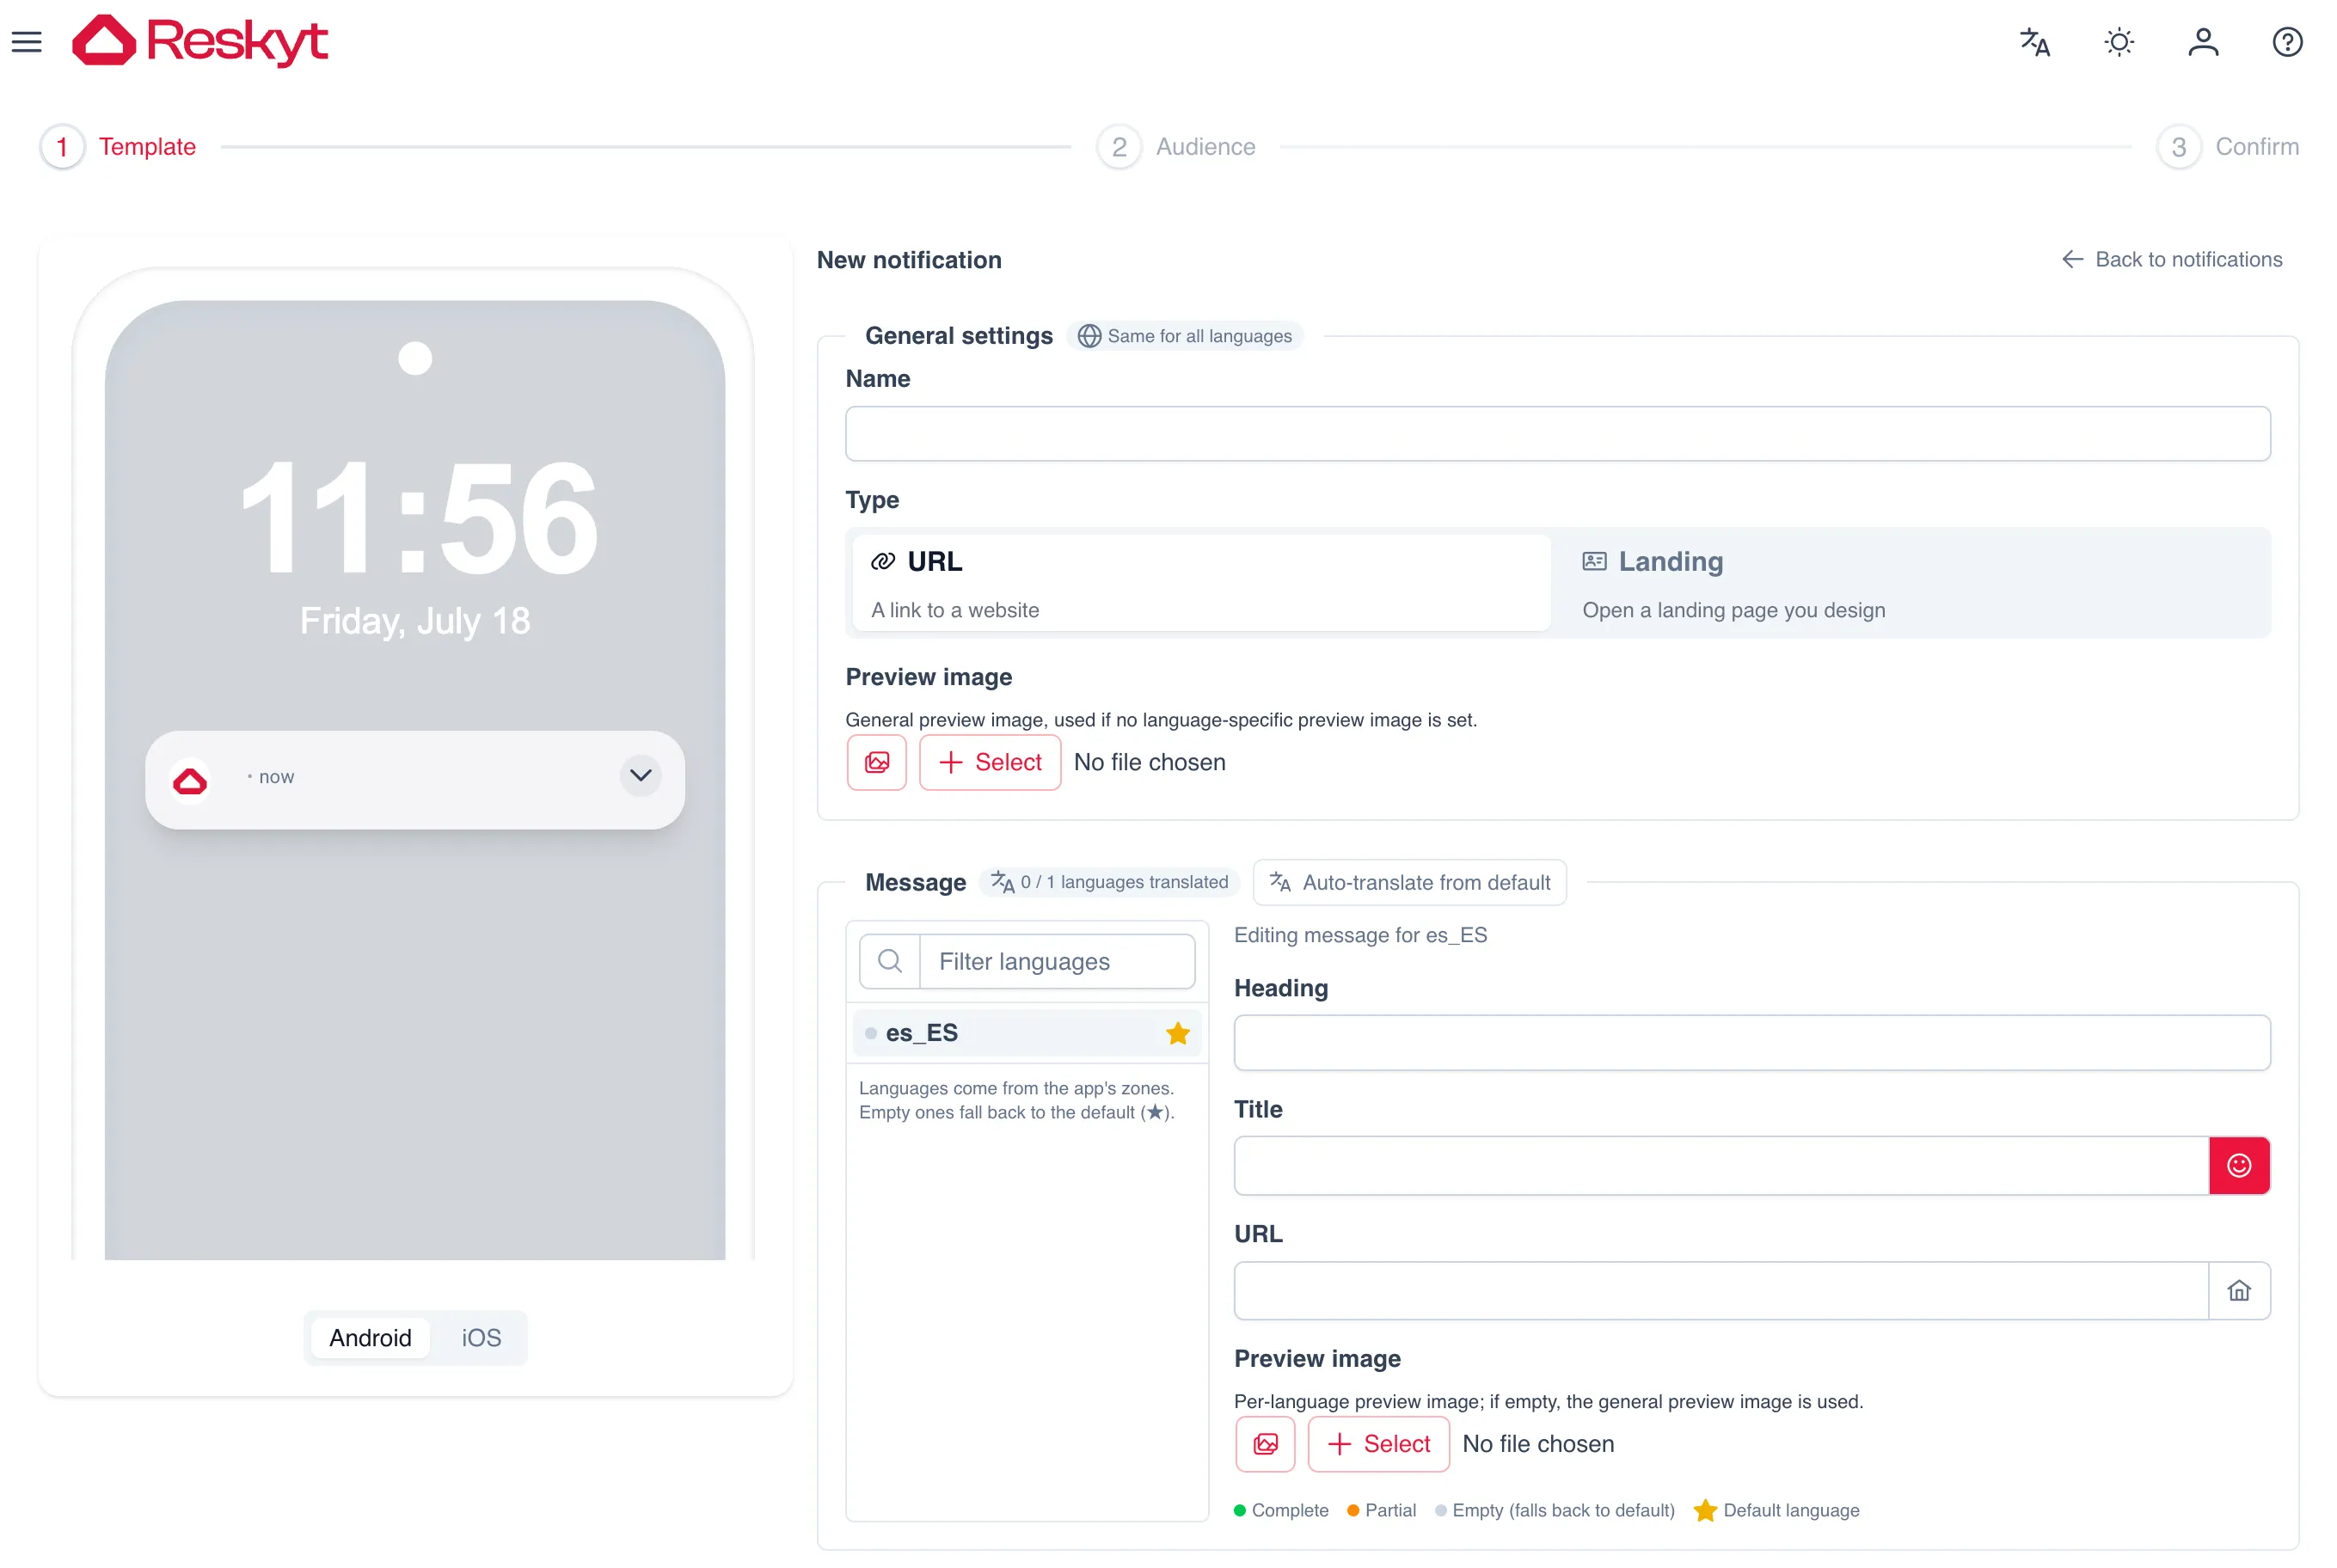
General settings
Section titled “General settings”These settings are shared by all languages.
| Field | What it is |
|---|---|
| Name | Internal name to recognise the template in the backoffice. The user does not see it. If left empty, it is saved with the default language code. |
| Type | Where the notification leads when tapped. URL opens a web address. Landing opens a landing page designed in the backoffice. |
| Landing page | Landing type only. The page that opens. It must be published for the notification to be sent. |
| Preview image | Image shown with the notification. It is used in the languages that do not have their own image. |
Message per language
Section titled “Message per language”The available languages come from the zones configured in the app. One of them, marked with a star, is the default language: users of a language left empty receive the default language’s message. To change it, click another language’s star.
These fields are filled in for each language:
| Field | What it is |
|---|---|
| Heading | The notification’s title. Up to 255 characters. |
| Title | The notification’s main text. Up to 255 characters. Supports emojis. |
| URL | URL type only. The address opened when tapped. |
| Preview image | Optional. Replaces the general image in that language. |
The default language must be complete. The others can be left empty or filled in entirely: a half-filled language prevents saving. The language list shows with a colour which ones are complete, partial or empty.
The Auto-translate from default button translates the heading and title into every other language and copies the URL. It replaces whatever was written in them, so it is worth reviewing the result.
While you type, the preview shows how the notification will look, and you can switch between the Android and iOS look.
Save and use the template
Section titled “Save and use the template”Create saves the template and returns to the list. From the same screen you can also save and go straight to Send now, Schedule or Create automation.
In the Notifications tab, each template has these actions:
| Action | What it does |
|---|---|
| Edit | Opens the template to change it. |
| Preview | Shows how it looks on the phone, in each language. |
| Send | Leads to Send now, Schedule or Create automation with the template already chosen. |
| Duplicate | Creates a copy of the template. |
| Sendings | Lists the sends made with it. |