
Automations
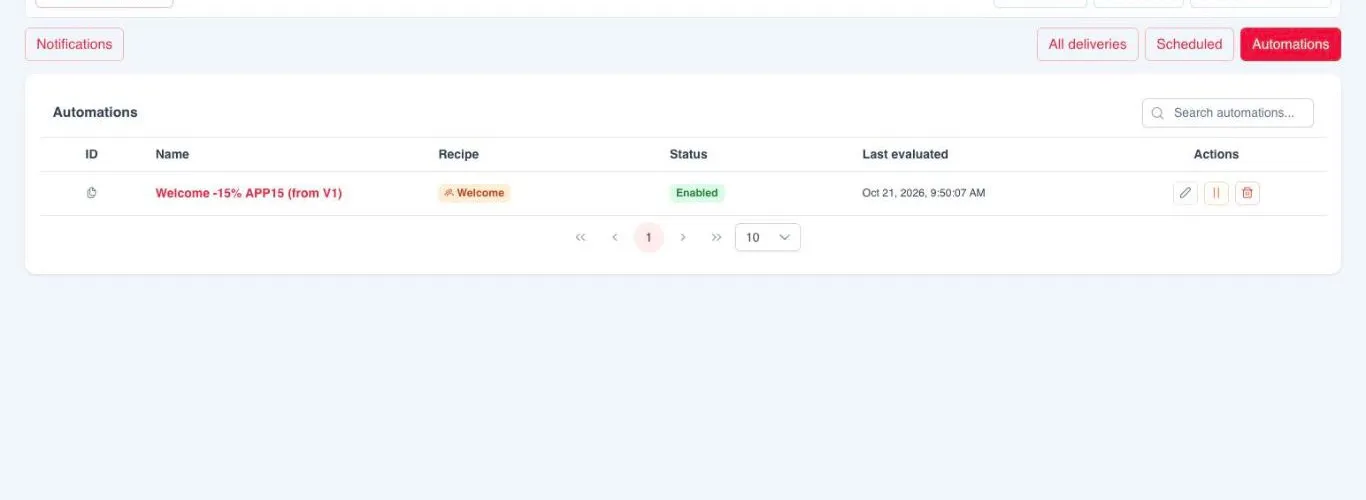
An automation sends a push notification without manual intervention when a condition is met: the first time the app is opened, a few days without using it, a specific day and time, or a shopping action such as starting a cart. They are managed in the app’s Notifications tab, in the Automations view.
Unlike a one-off send with Send now or Schedule, an automation is set up once and keeps sending for as long as it is enabled.
Create an automation
Section titled “Create an automation”In the Notifications tab, click Create automation. The wizard has three steps: Trigger, Template and Confirm.
- Trigger. Enter the Automation name, choose a recipe and complete its Automation settings. Each recipe is described below.
- Template. Choose the notification that will be sent. If it does not exist yet, create it with Create notification. Content and languages are described in create a notification.
- Confirm. The screen summarises the trigger, the template, the on-tap action and the audience. This is where you set the Inbox relevance, between 1 and 60 days, which defaults to 7 days. If the app has more than one environment, you also choose the Environment that receives the sends. To finish, click Save automation.
Once saved, the automation is enabled.
Recipes
Section titled “Recipes”| Recipe | When it sends |
|---|---|
| Welcome | When the user opens the app for the first time. |
| Days after install | A number of days after the first app open. |
| Re-engage | A number of days after the last app open. |
| Recurring | Every day or on the chosen days of the week, at a set time. |
| Behavioural event | Some time after a shopping action. |
Welcome
Section titled “Welcome”Sends the notification when a user opens the app for the first time. Each device receives it only once. It has no settings.
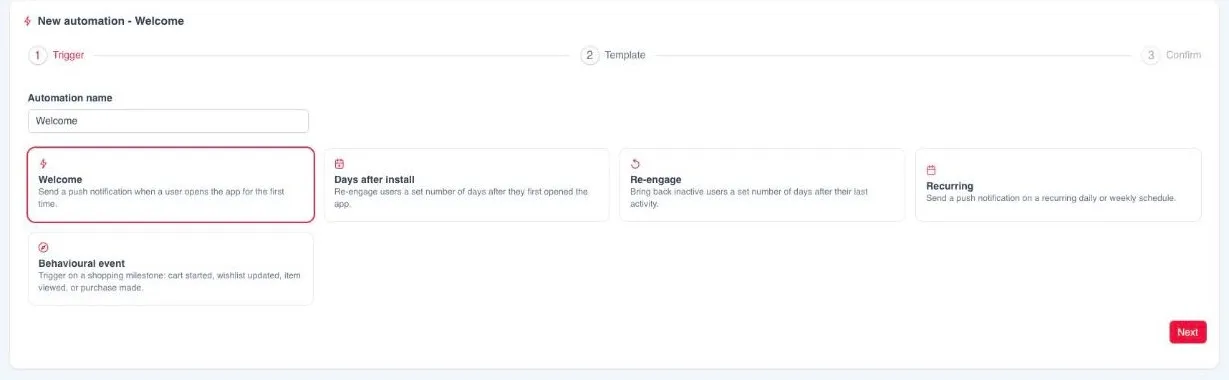
It is the usual recipe to welcome users, introduce the app or deliver a first-purchase discount code.
Days after install
Section titled “Days after install”Sends the notification a number of days after the user first opened the app. Each device receives it only once.
| Setting | Value |
|---|---|
| Delay (days) | Days since the first app open. Minimum 1, default 7. |
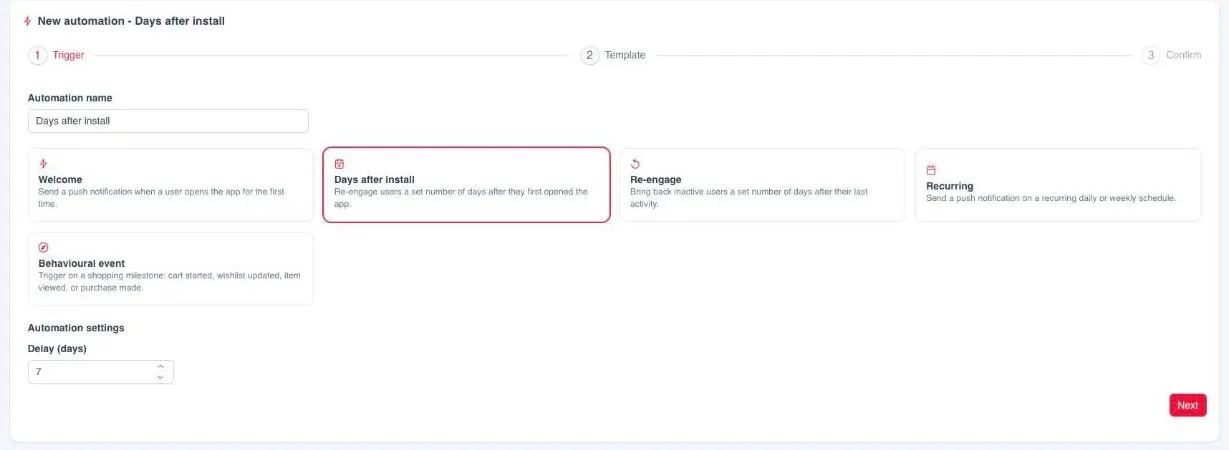
Several automations of this recipe with different delays, for example 3, 7 and 14 days, make up an onboarding sequence.
Re-engage
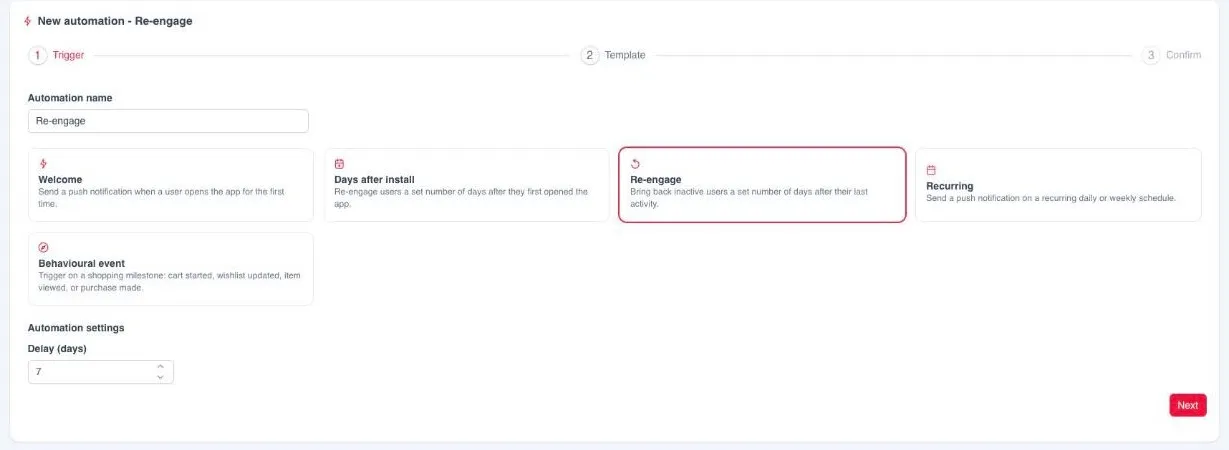
Section titled “Re-engage”Sends the notification a number of days after the last time the user opened the app. Each open restarts the count, so a user can receive it again if they come back to the app and then stop using it again.
| Setting | Value |
|---|---|
| Delay (days) | Days without opening the app. Minimum 1, default 7. |
Recurring
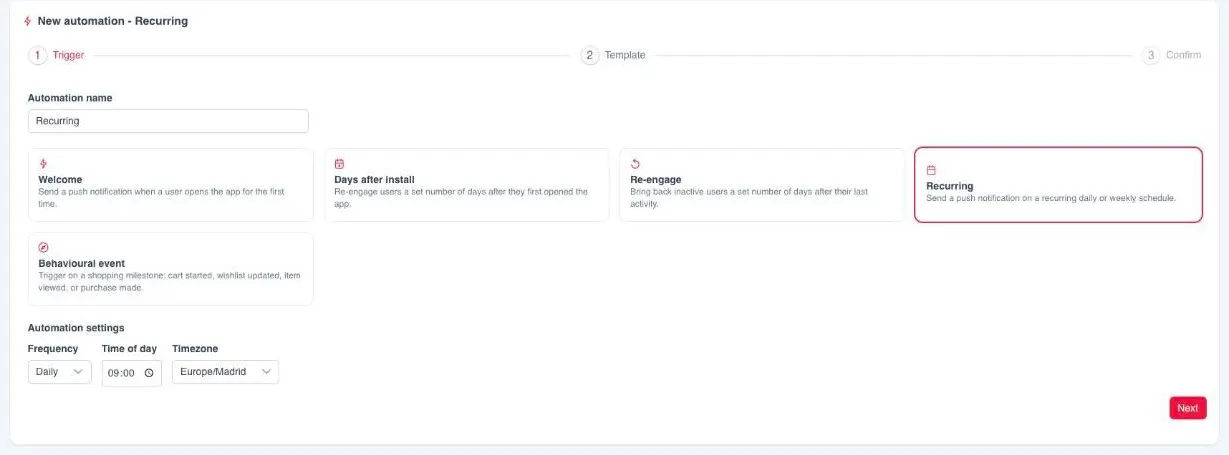
Section titled “Recurring”Sends the notification periodically, every day or on the chosen days of the week, at a set time. It targets every user with push enabled at the time of each send.
| Setting | Value |
|---|---|
| Frequency | Daily or Weekly. |
| Time of day | Time of the send. Default 09:00. |
| Days of week | Weekly frequency only. At least one must be chosen. |
| Timezone | Zone in which the time is interpreted. By default, that of the browser used to create it. |
Behavioural event
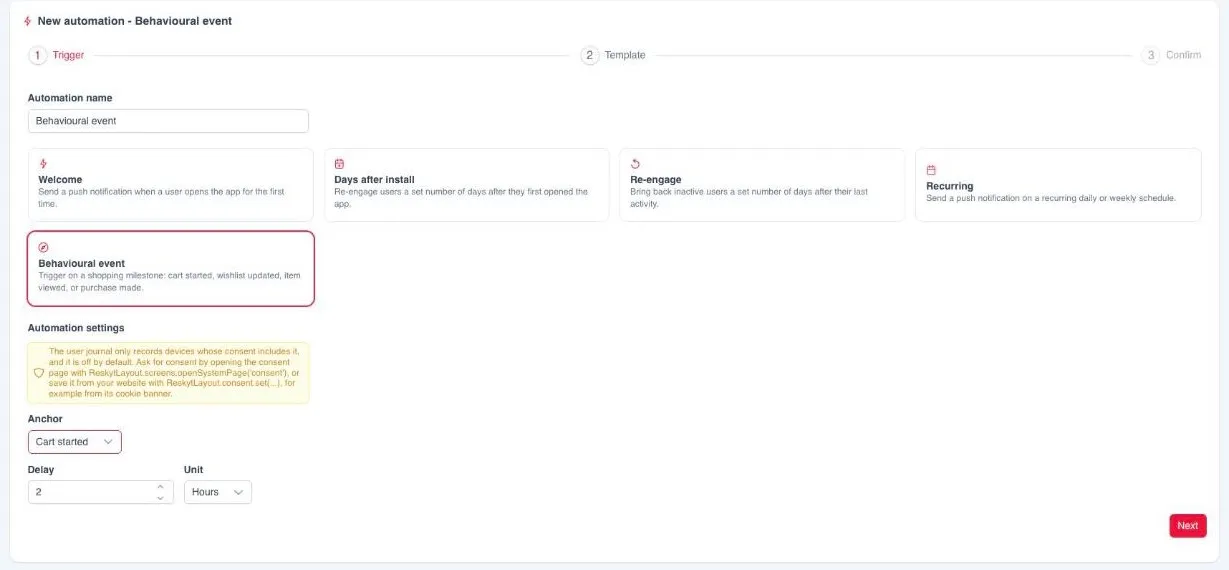
Section titled “Behavioural event”Sends the notification some time after a shopping action by the user inside the app, such as starting a cart. It is the abandoned cart recipe.
| Setting | Value |
|---|---|
| Anchor | The action the delay is counted from. |
| Delay | Time since that action. Minimum 1 hour, default 2. |
| Unit | Hours or Days. |
| Anchor | Event it needs | What the delay counts from |
|---|---|---|
| Cart started | add_to_cart | When the user starts a cart. Adding more products does not push it back, and if the user buys or empties the cart it is no longer sent. |
| Wishlist updated | wishlist_add | The last change to the wishlist. |
| Item viewed | view_item | The last product viewed. Users who went on to buy also receive it. |
| Purchase made | purchase | The last order. A new order restarts the count. |
An anchor can only be chosen if the app has received its event in the last 30 days; otherwise it is shown as disabled and, when you hover over it, it states what is missing. Common combinations are Cart started with 2 hours, for the abandoned cart, or Purchase made with a few days, for the post-purchase follow-up.
This recipe uses data from the User Journal module, which records shopping activity inside the app. For it to appear in the wizard you need:
- Enable the User Journal module in Settings, Modules, and republish the app. If you do not have access to that section, ask support to enable it.
- The store must send the events. They are read from the ecommerce events
the website already sends to its dataLayer with Google Tag Manager or gtag.
Shopify stores are detected automatically. The website can also record an
event with
window.ReskytLayout.journal.track(type, data). - The user must give consent. By default recording is off for every user.
It is turned on when the user accepts the consent page, which is opened with
ReskytLayout.screens.openSystemPage('consent'), or when the website saves their choice withReskytLayout.consent.set(...), for example from its cookie banner.
Only activity inside the app is recorded, not activity on the website opened in a browser.
Audience
Section titled “Audience”An automation has no audience step: it targets every user with push notifications enabled who meets the recipe’s condition.
The Estimated recipients figure on the Confirm step counts every device with push enabled, not the ones that will meet the condition. The actual number for each send depends on how many users meet it at each moment.
When it sends
Section titled “When it sends”Automations are checked every few minutes, so a send may go out a few minutes after the exact moment. Each user receives an automation once for each time they meet the condition. If nobody meets it at a check, no send is created.
An automation only sends to users who meet the condition after it is enabled. Enabling a Welcome recipe, for example, does not send to users who had already opened the app before.
Manage automations
Section titled “Manage automations”The Automations view lists each automation with its name, its recipe, its status (Enabled or Disabled) and the Last evaluated date. From each row you can Edit, Enable or Disable, and Delete.
Editing an automation keeps its status, but the recipe cannot be changed. To use a different recipe, create a new automation.
Tracking
Section titled “Tracking”Each automation’s detail page, opened by clicking its name, shows a summary of its configuration, a preview of the notification and its Recent sendings.
Sends from all automations also appear in All deliveries, by selecting Automation in the Mode filter. There you can check the sent, rejected and read counts for each send.
If a notification does not arrive, the order of checks is in push troubleshooting.