
Connectif
Connectif can send the app’s push notifications from its workflows through the Reskyt push API. This makes it possible to automate cases such as abandoned cart recovery, remarketing or birthday greetings with the contact data already stored in Connectif.
The integration has four parts:
- A contact custom field that stores the app’s device identifier.
- A workflow that collects that identifier while the contact browses the app.
- A custom integration (webhook) that calls the push API.
- The workflows that send the notifications.
Before you start
Section titled “Before you start”You need an API key for the Reskyt push API. API keys are generated from the Reskyt panel.
In V2, recipients are identified with the deviceId field, which carries the
hashed installation ID of each app installation. It is not an APNs or FCM
token. It is obtained inside the app with window.ReskytLayout.device.getId(),
as described in the technical reference.
With this setup, each Connectif contact stores a single identifier: the one from the last device they browsed the app from. If several people sign in on the same device, several contacts can have the same identifier.
1. Create the custom field
Section titled “1. Create the custom field”-
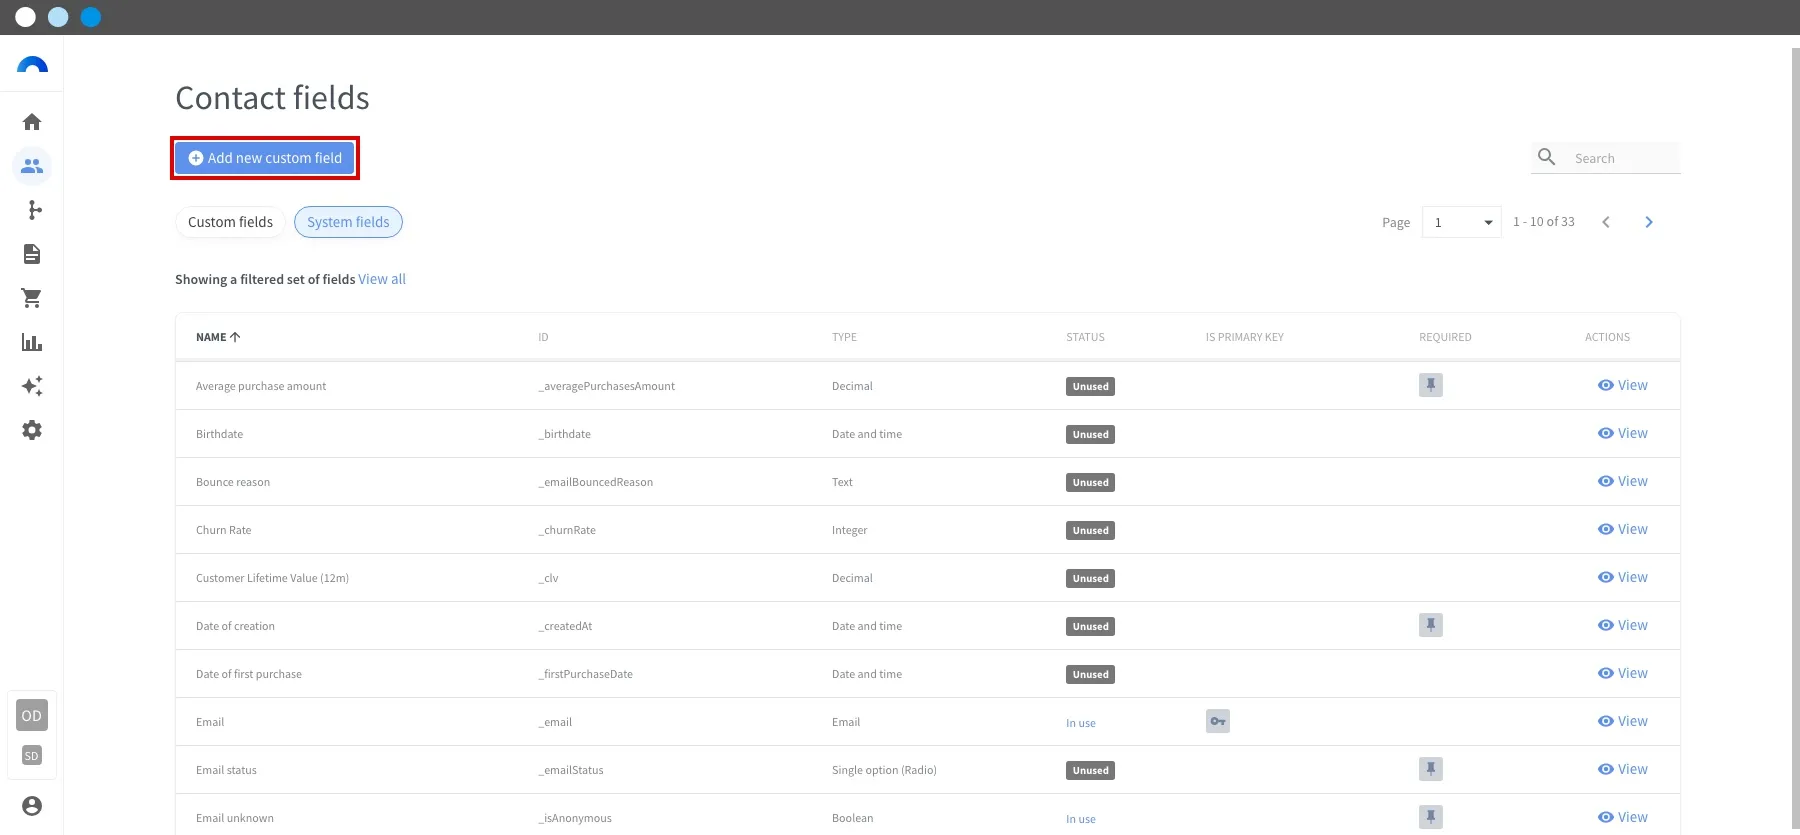
In Connectif, go to Contacts > Contact fields and click Add new custom field.
-
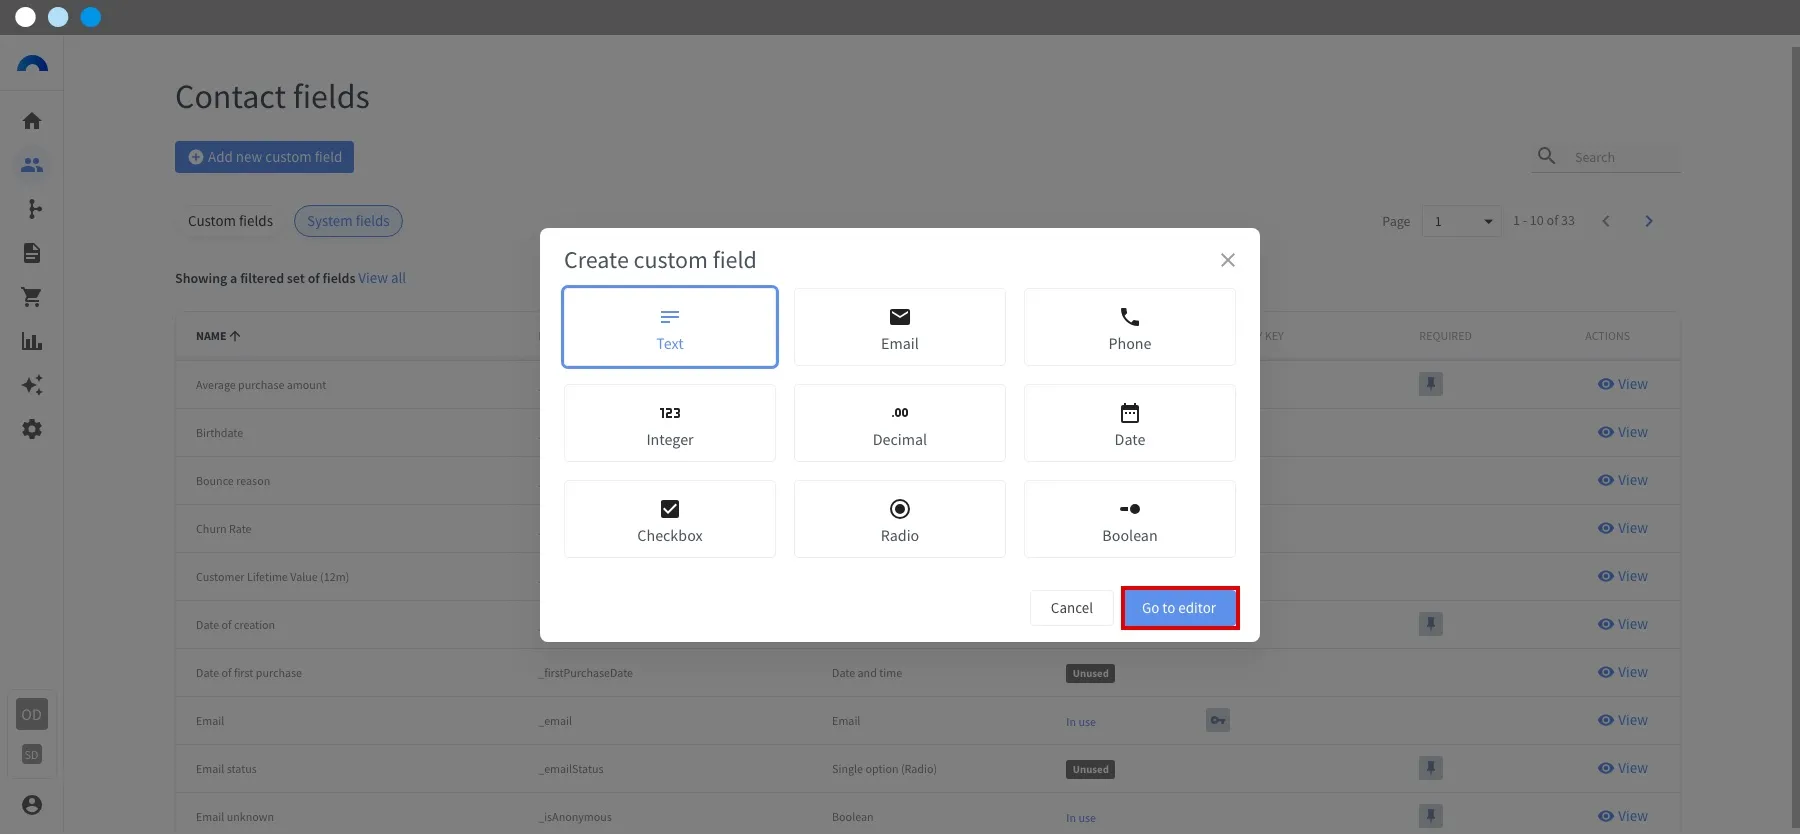
Choose the Text type and click Go to editor.
-
Enter
reskyt-device-idas the Name and the ID, and click Save.
2. Collect the device identifier
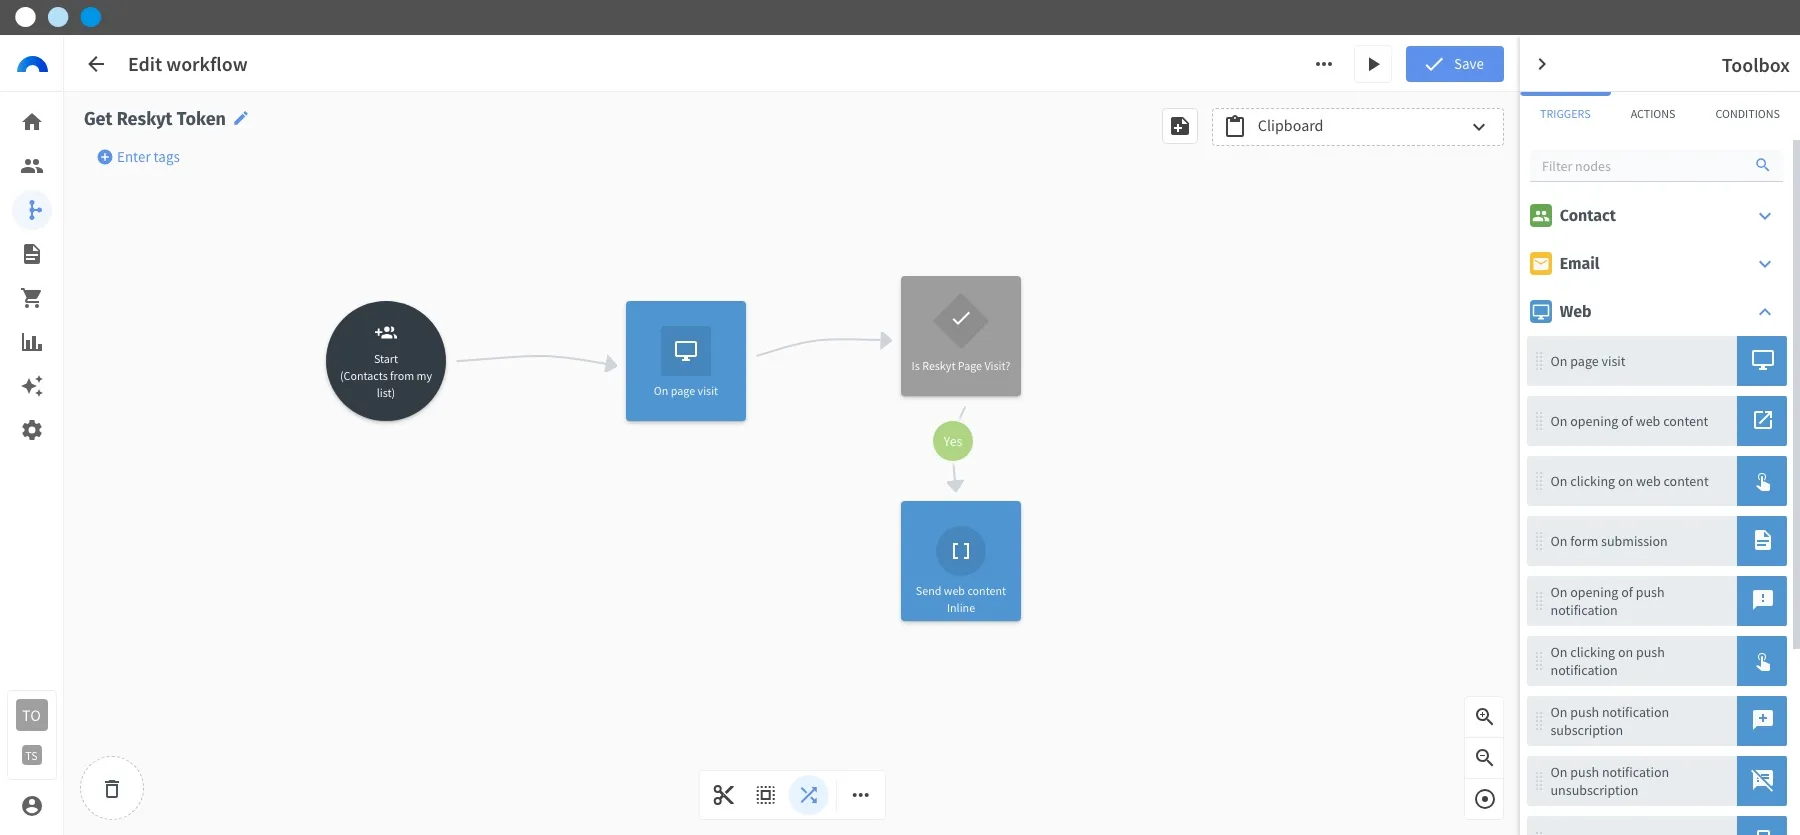
Section titled “2. Collect the device identifier”This workflow detects that the contact is browsing from the app and injects a script that gets the device identifier and stores it in the custom field.
-
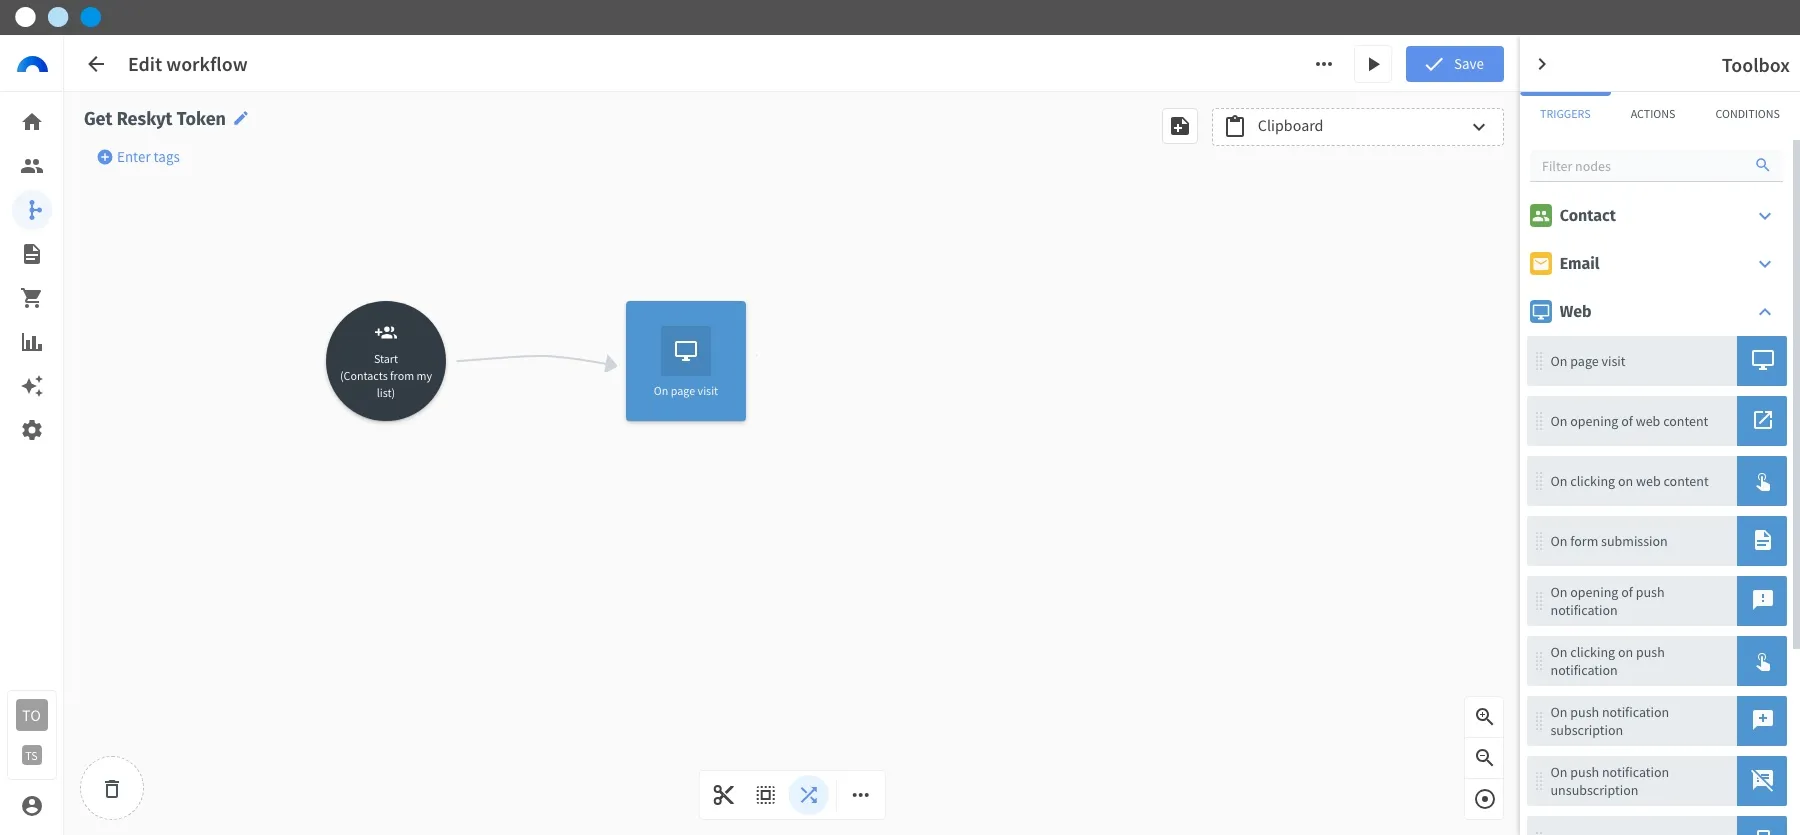
Go to Workflows, click Create new workflow and choose a blank workflow.
-
In the Start node, select All contacts from my list.
-
Add the On page visit trigger node. In its Limitations tab, remove all limitations.
-
Add the Check value condition node and open its editor.
-
Drag User Agent, from the On page visit group, to the left column of the central panel. Drag a Literal value to the right column, type
rktwebviewand leave the operator as Contains. Click Update.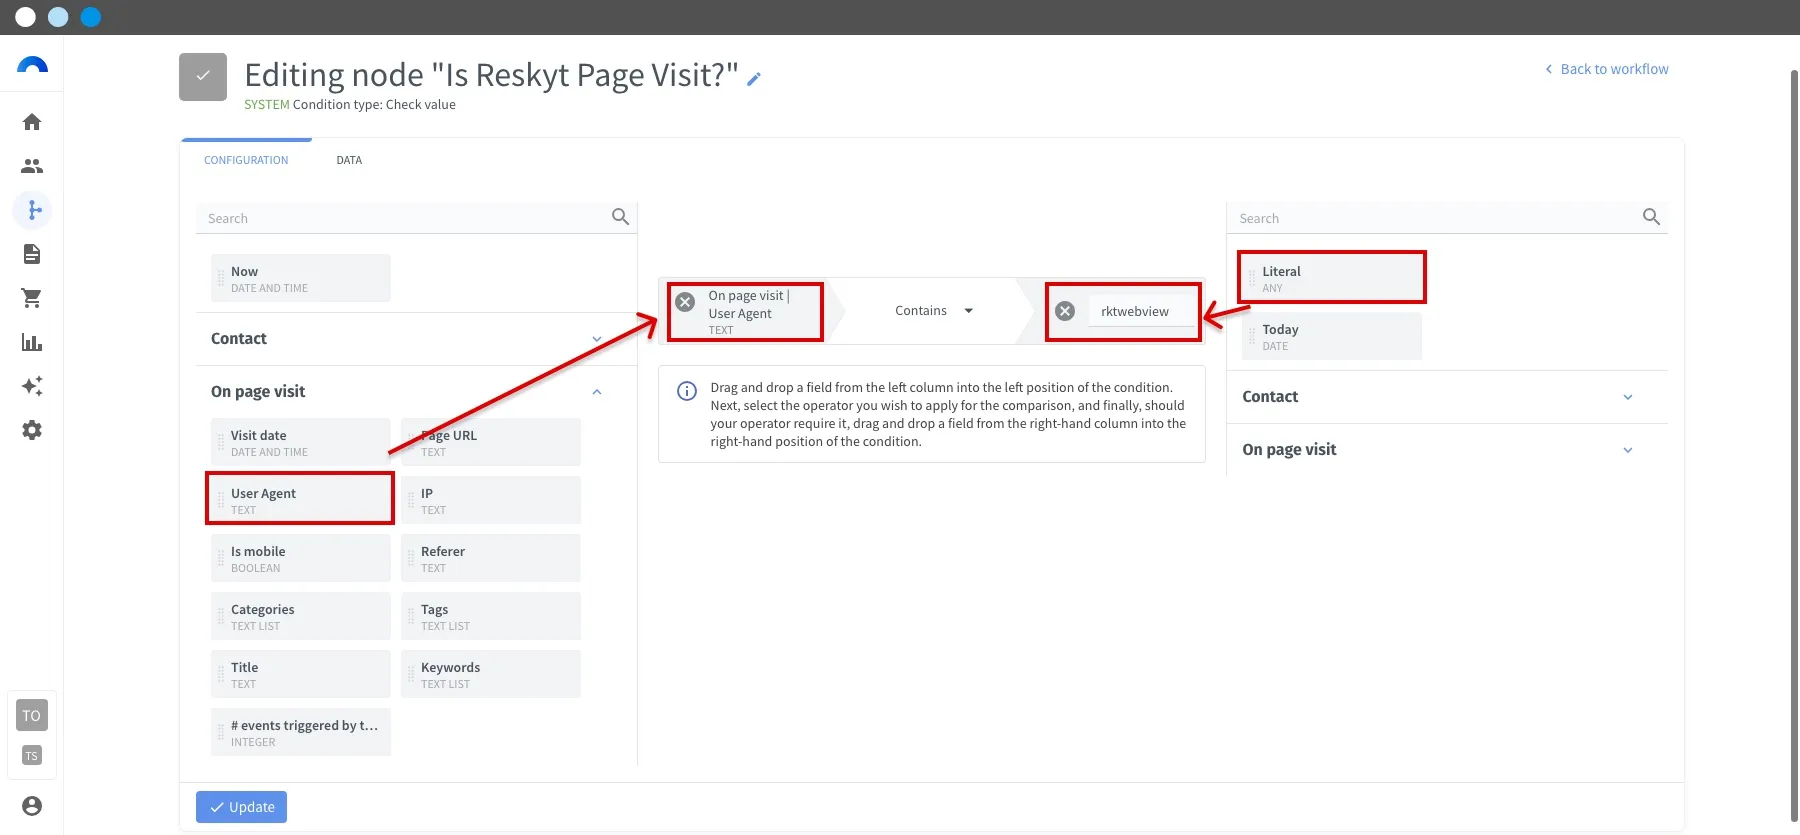
rktwebviewis the identifier the app includes in its user agent. If the app has a custom user agent, use the configured value. See Custom User Agent. -
Add the Send web content action node on the Yes output of the Check value node.
-
In the node configuration, click Create new content, choose the Inline type, give it a name such as
Reskyt Scriptand confirm. -
Add an HTML component with this code:
<script>(function connectifReskyt(global) {if (global.navigator.userAgent.indexOf("rktwebview") === -1) return;if (!global.ReskytLayout) return;if (global.connectif &&global.connectif.managed &&global.connectif.managed.isInitialized()) {sendDeviceId();} else {global.document.addEventListener("connectif.managed.initialized",sendDeviceId);}function sendDeviceId() {global.ReskytLayout.whenReady().then(function (ready) {if (!ready) return;return global.ReskytLayout.device.getId();}).then(function (deviceId) {if (!deviceId) return;var previous = global.sessionStorage.getItem("cn_reskyt_device_id");if (deviceId === previous) return;global.connectif.managed.sendEvents([], {entityInfo: { "reskyt-device-id": deviceId },onResponded: function () {global.sessionStorage.setItem("cn_reskyt_device_id", deviceId);}});});}})(window);</script>The script only acts inside the app, waits until the app is ready, gets the identifier with
ReskytLayout.device.getId()and stores it in the contact’sreskyt-device-idfield. If the device is not registered yet, the identifier isnulland nothing is stored. To avoid sending it again on every page, it remembers the last value during the session. -
Save the content, go back to the selector, select the Inline content you just created and click Next.
-
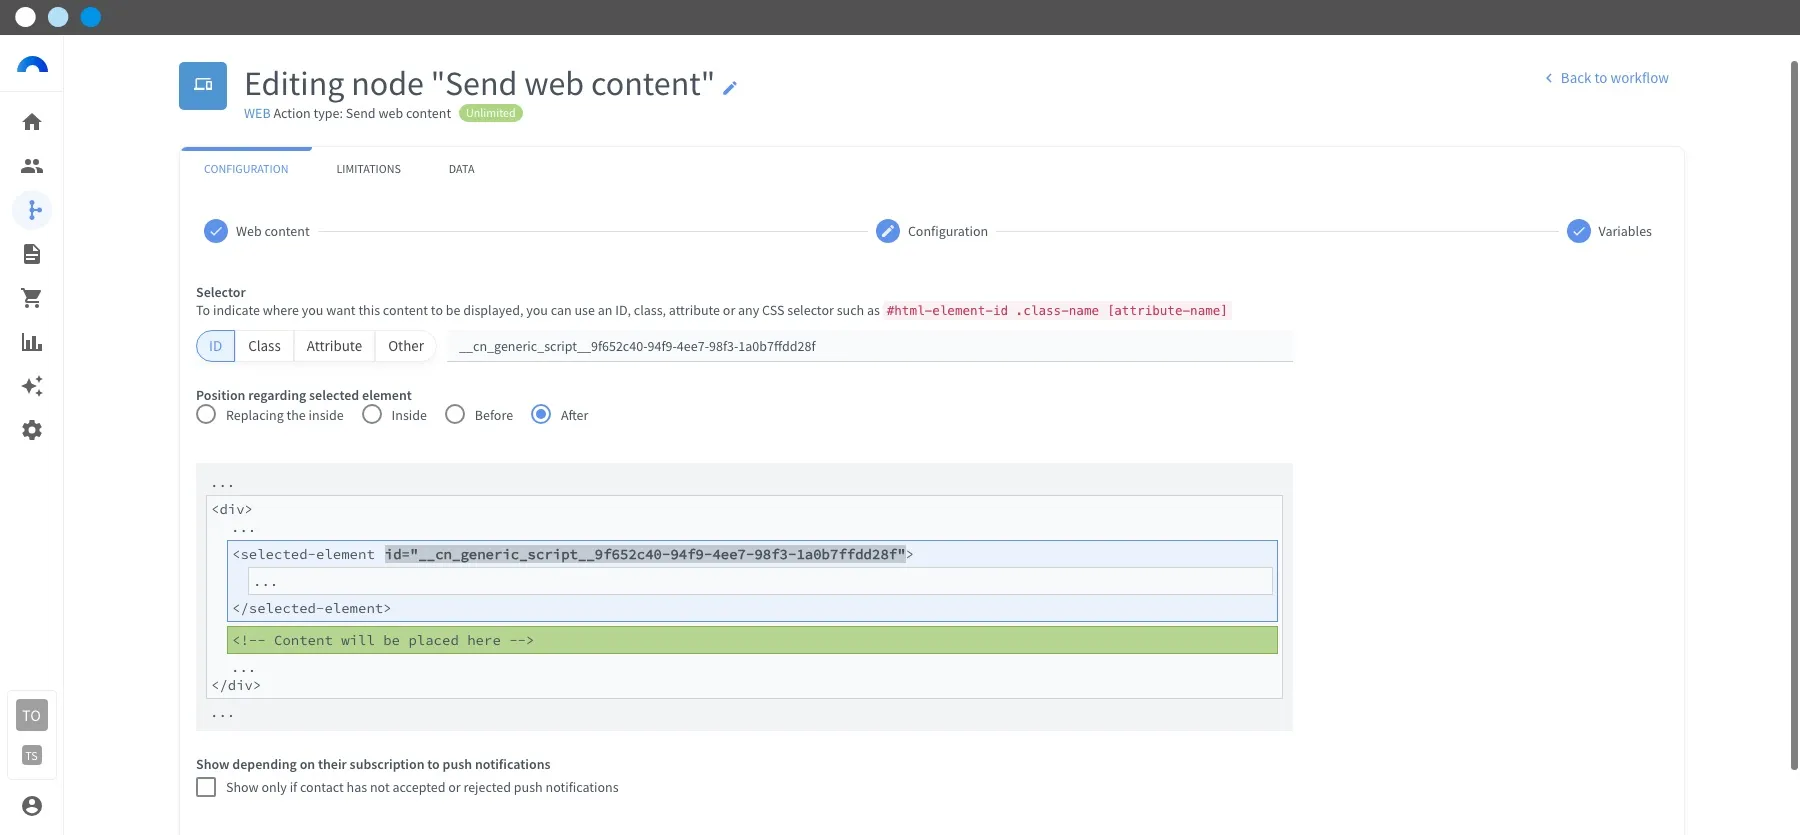
In Configuration, set the selector where the content is inserted. Use an element present on pages shown both on the web and in the app, such as the product page.
-
In the Limitations tab, remove all limitations and click Finish.
-
Save and activate the workflow.
3. Create the push API integration
Section titled “3. Create the push API integration”-
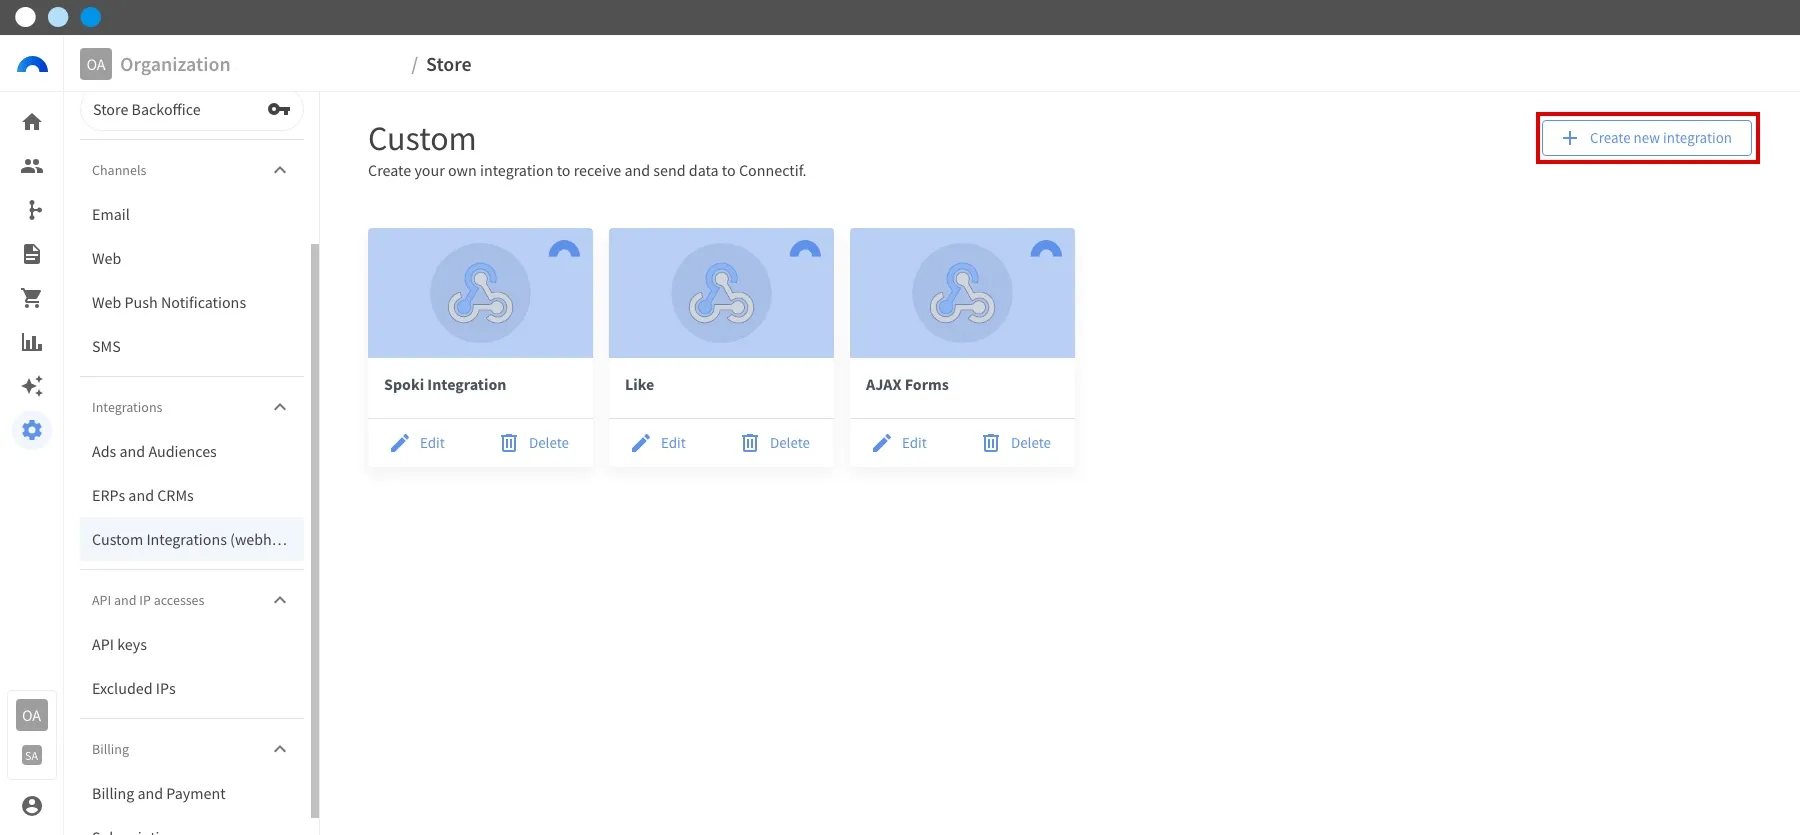
In Store settings, go to Integrations > Custom Integrations (webhooks) and click Create new integration.
-
Give the integration a name and click Update.
-
In the Send data tab, click Create new outbound event and give the event a name.
-
In Webhook URL to send the message to, enter the push API endpoint:
https://push.api.reskyt.com/push/send -
Click Add new header, with the name
x-api-keyand your API key as the value. -
With Add new field, create the event fields. The name and ID of each field match the API field:
Name and ID Type Required Options deviceIdText Yes Enable the JSON options with the pointer /deviceId/0titleText Yes — headingText No — urlText No — pictureUrlText No — dateEndInteger No — The JSON pointer
/deviceId/0makes Connectif send the identifier inside a list, which is thestring[]format the API expects. The meaning of each field is in the push API reference. -
Click Save.
4. Send a notification from a workflow
Section titled “4. Send a notification from a workflow”-
Go to Workflows, click Create new workflow and choose a blank workflow.
-
In the Start node, select the segment of app contacts.
-
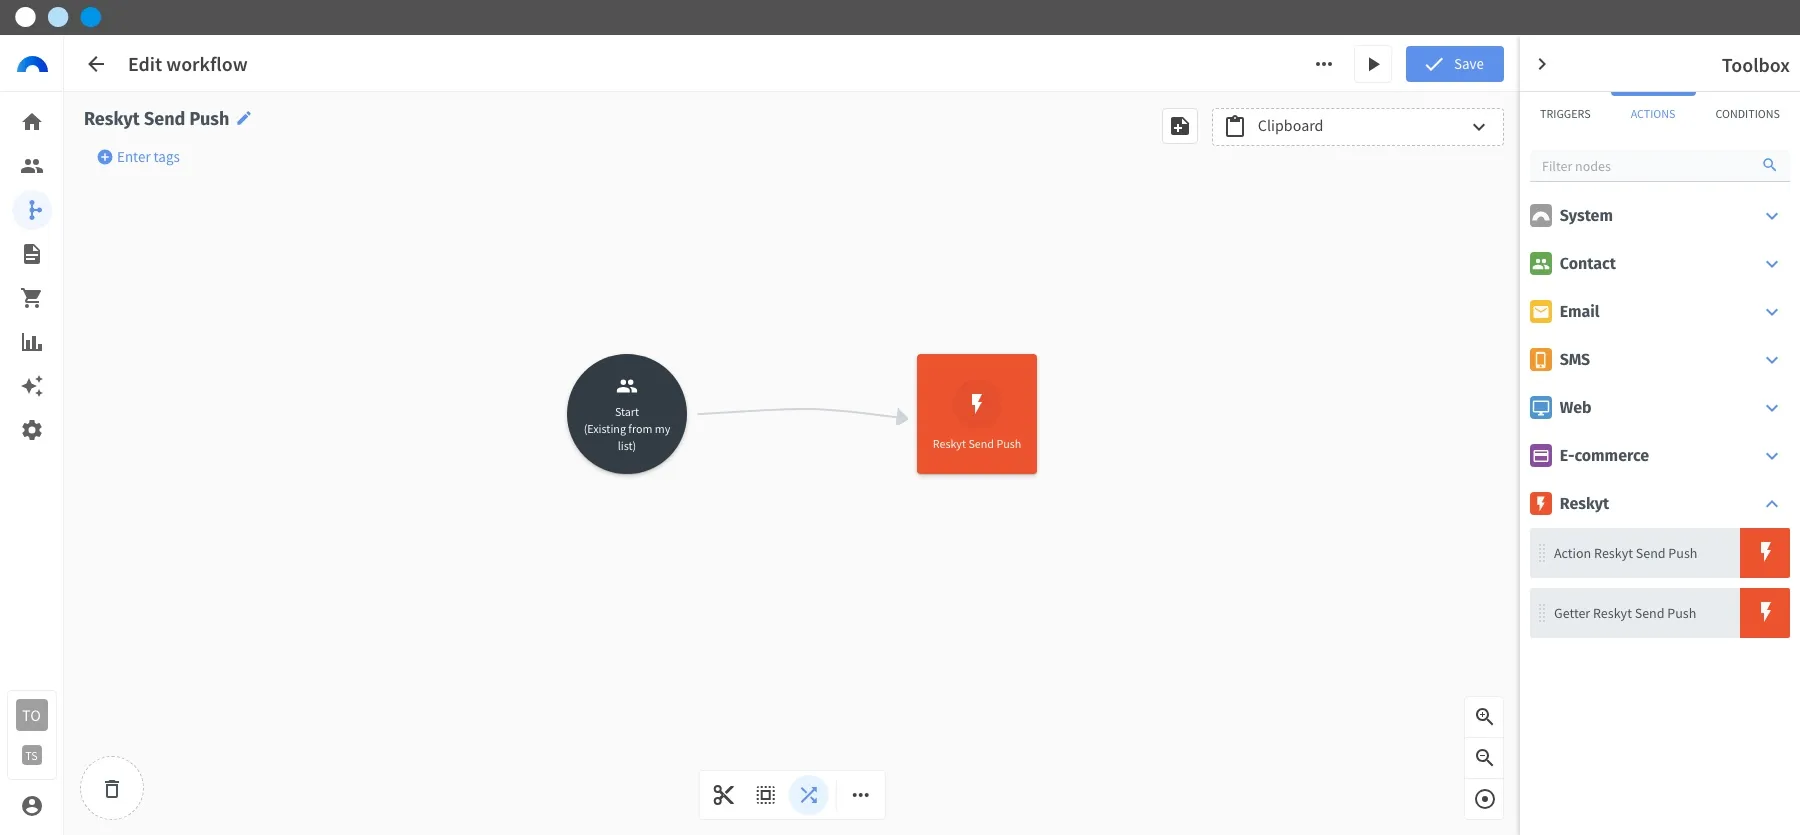
Add the action node created with the integration in the previous step.
-
In the node configuration, drag the
reskyt-device-idfield from the contact information and assign it todeviceId. Fill in the rest of the fields with Literal values or contact data to personalize the notification.dateEndis a Unix timestamp in seconds. If you leave it empty, the API applies 7 days from the send. -
Click Update and activate the workflow.
Before activating a workflow that reaches the whole base, check the result
with a test contact whose reskyt-device-id matches your own device.