
Google Sign-In
Type: SDK · Status: Available · Category: Identity and login
Required credentials
Section titled “Required credentials”| Field | Required | Where to get it |
|---|---|---|
Google Sign in Server Key | Yes | console.cloud.google.com/apis/credentials, in the app, OAuth client of type Web application. It is its Client ID. |
Google Sign in iOS Url Scheme | Yes | Same panel, OAuth client of type iOS. It appears when saving it, next to the iOS Client ID. |
Google Sign in iOS Client ID | Yes | Same panel, OAuth client of type iOS. It appears when saving it, next to the iOS URL Scheme. |
To find them, in the Google console select the app in the dropdown at the top left and go to the Credentials section. The secret does not need to be provided for any of the three clients.
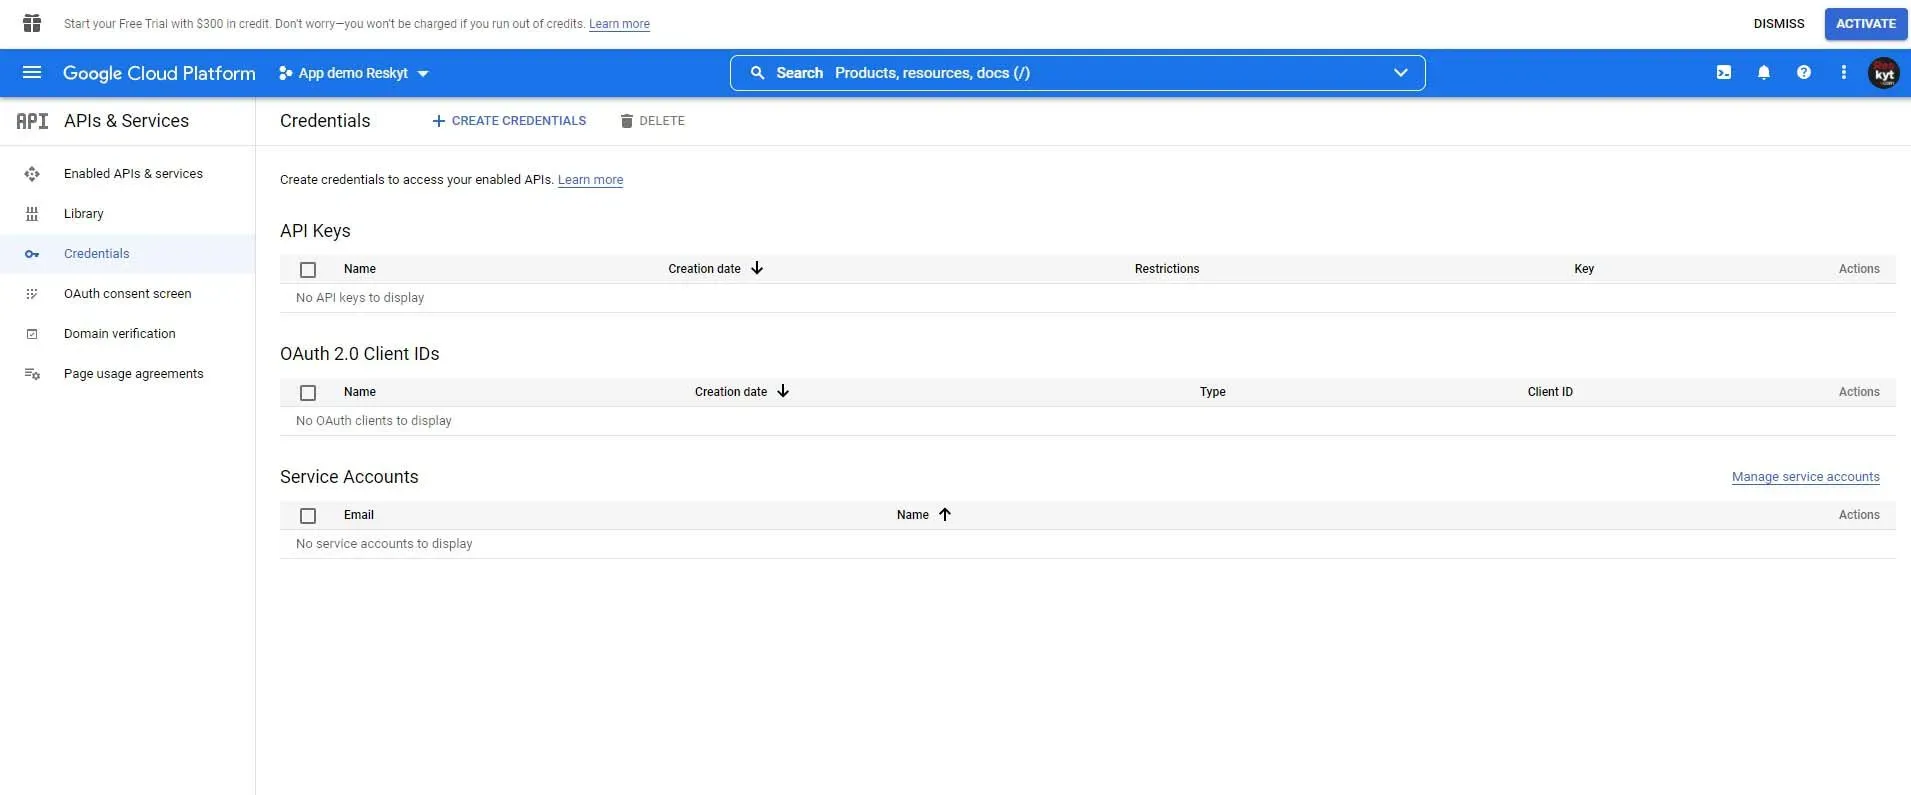
These credentials are provided to Reskyt by email.
How to get the Server Key
Section titled “How to get the Server Key”If a valid Server Key already exists, there is no need to create another: just provide it to Reskyt. Otherwise:
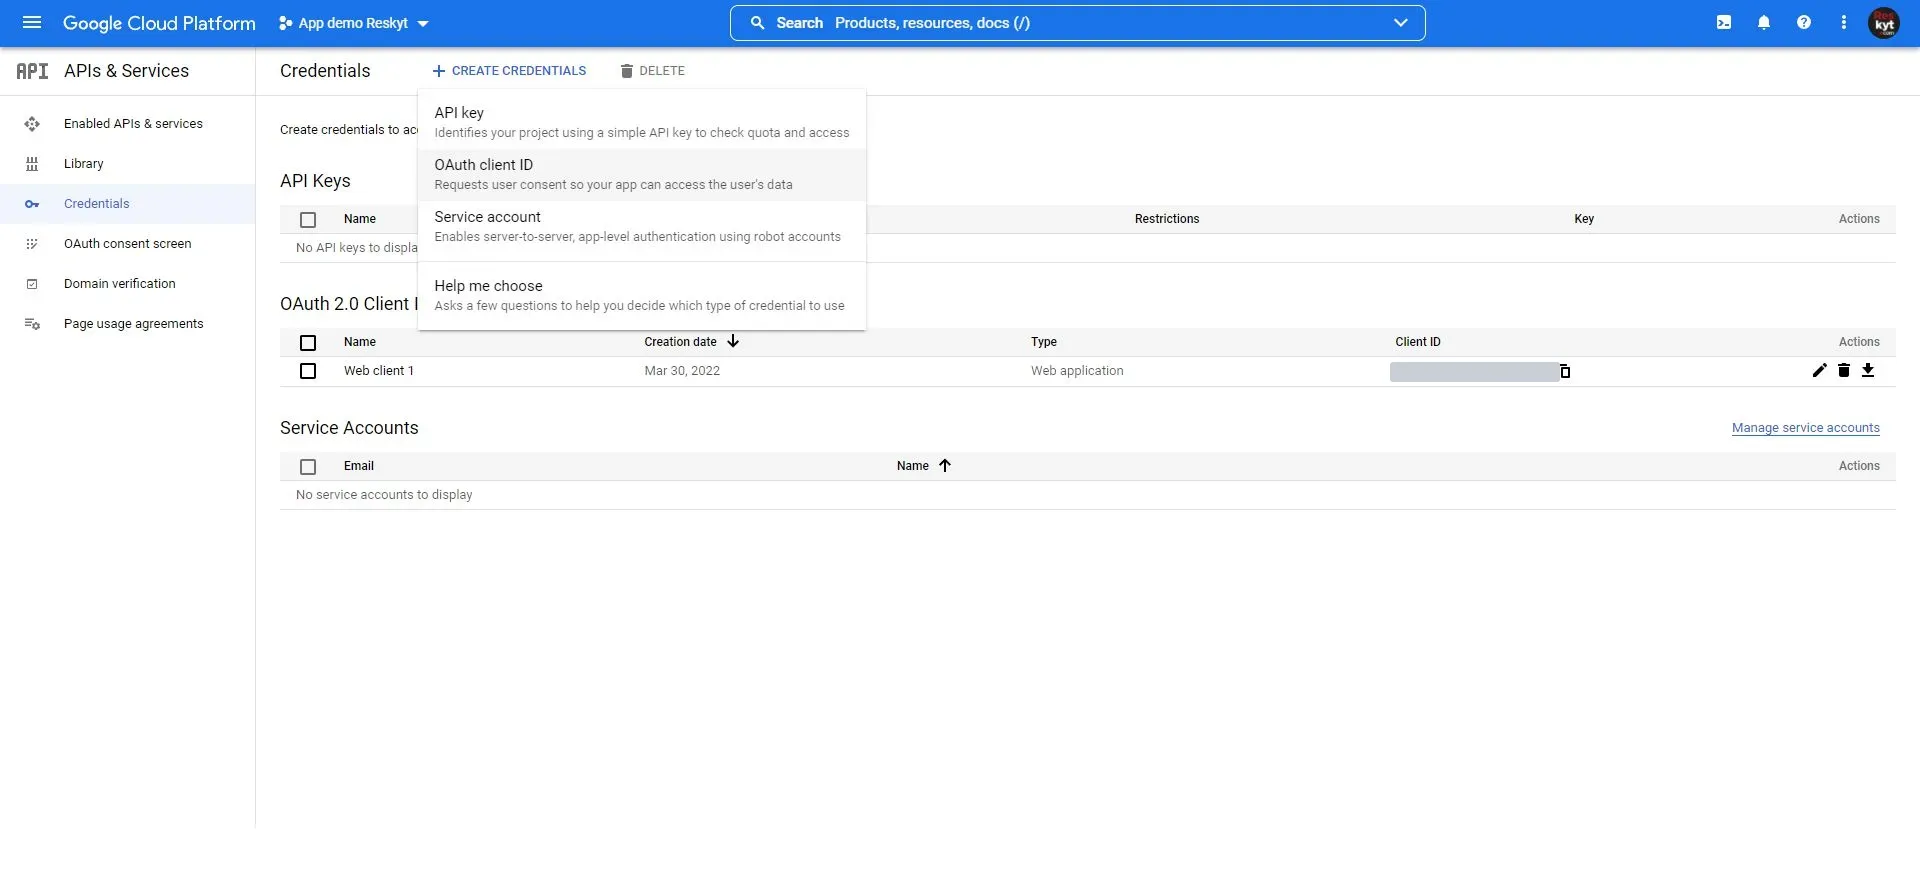
- In Credentials, click + Create Credentials at the top left and select OAuth client ID.
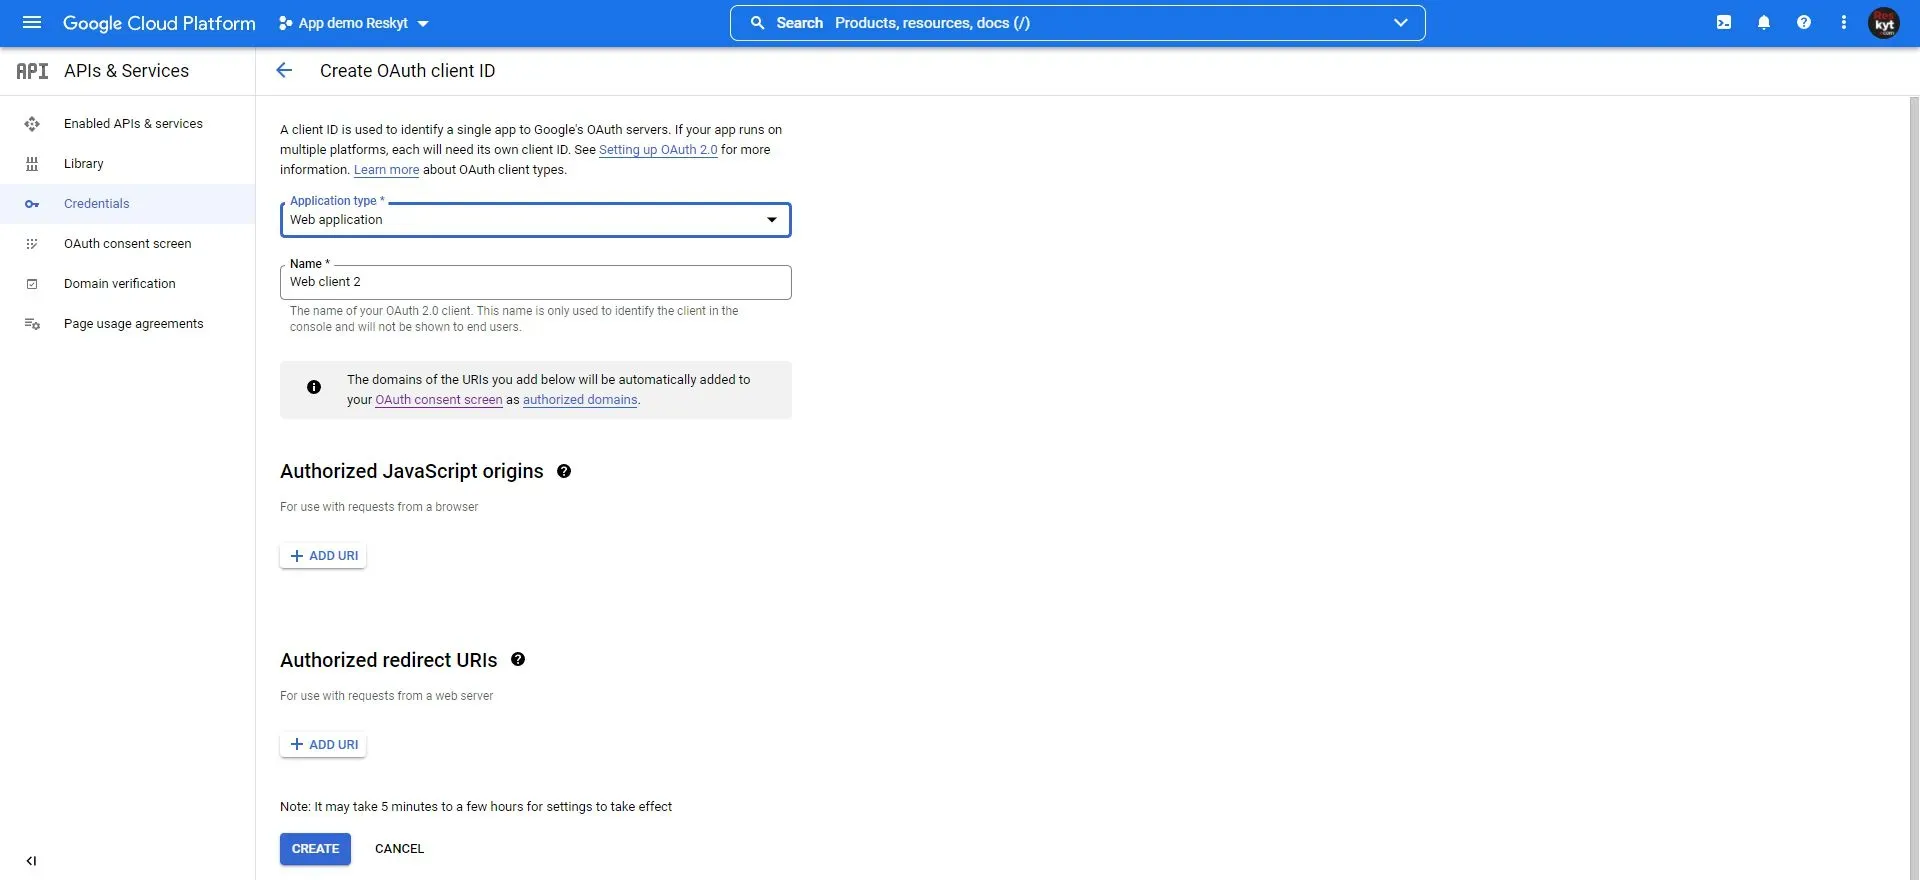
- Select the application type Web application and give it a descriptive name so it can be identified later.
- After saving, a window shows the Client ID. That is the value of
Google Sign in Server Key.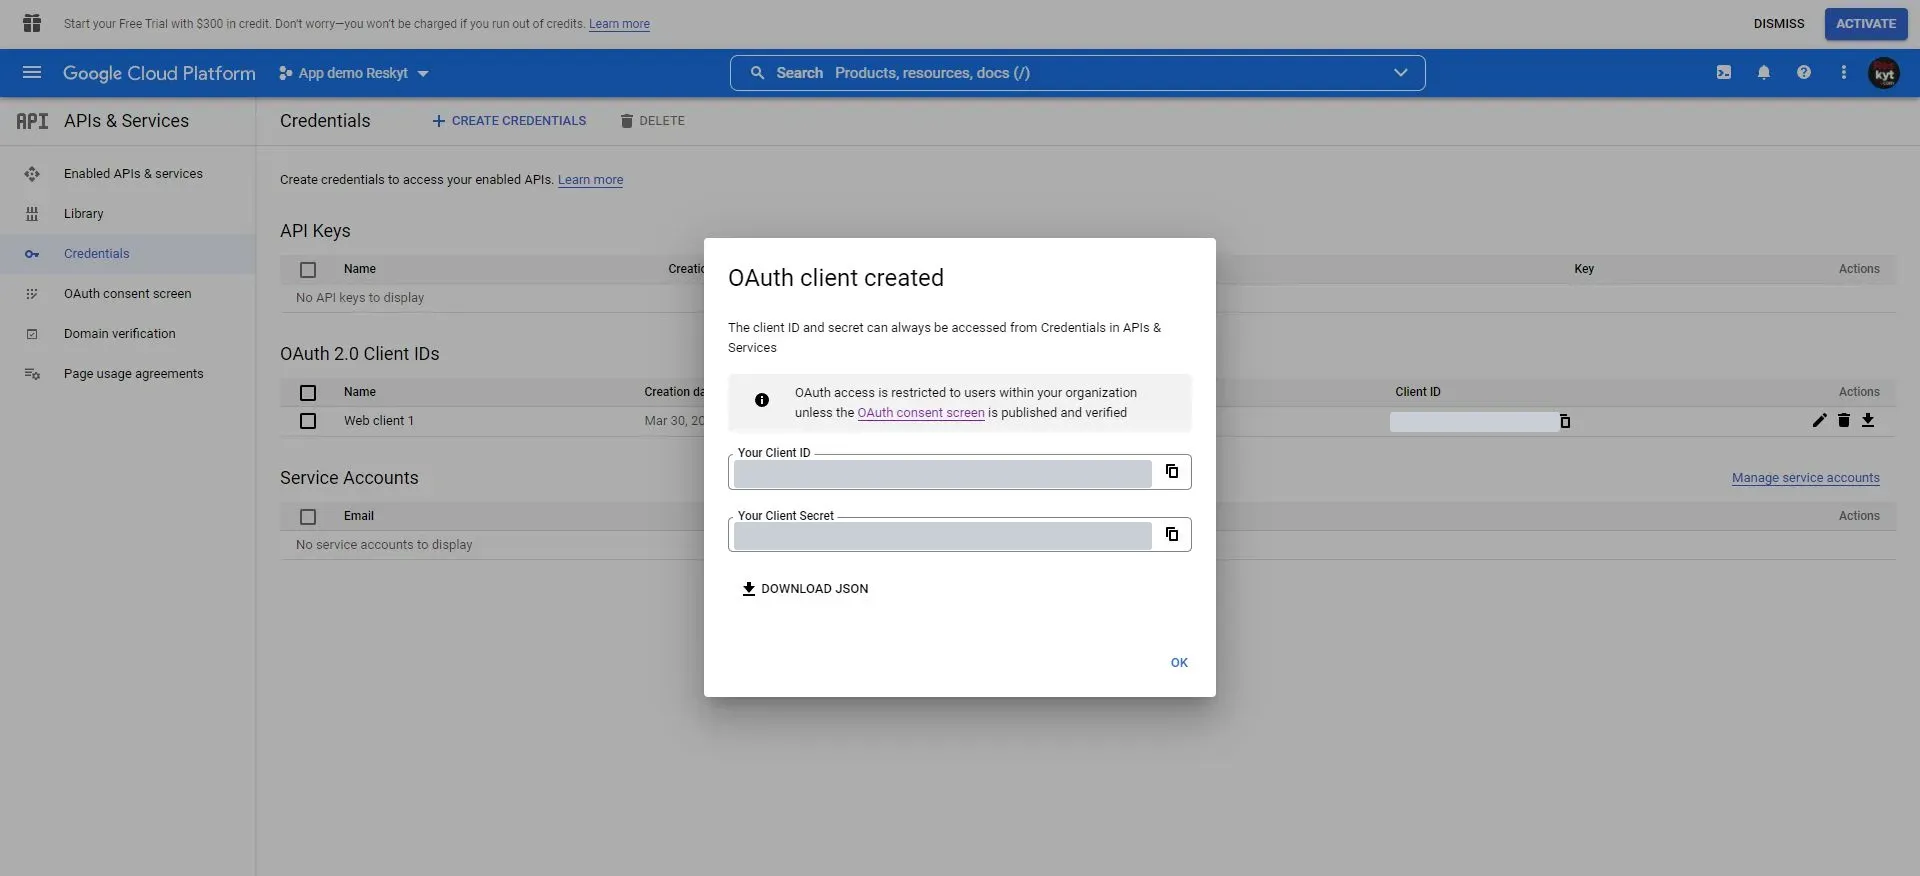
Create the Android client
Section titled “Create the Android client”The Android client must exist, but no data from it needs to be provided to Reskyt: Google configures it automatically.
- In Credentials, click + Create Credentials, select OAuth client ID and the application type Android.
- Give it a descriptive name.
- Enter the package name of the app.
- Enter the SHA-1 of the keystore used to sign the app.
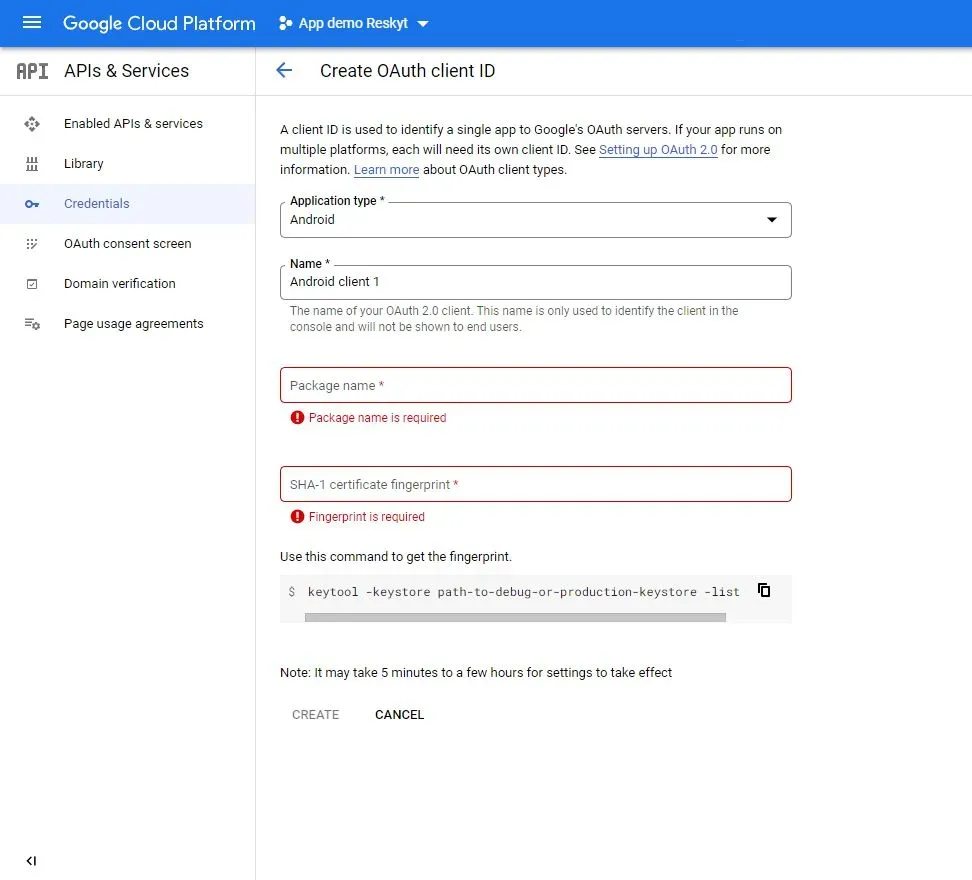
- Save. The process is then complete.
Create the iOS client and get its data
Section titled “Create the iOS client and get its data”- In Credentials, click + Create Credentials, select OAuth client ID and the application type iOS.
- Give it a descriptive name.
- Enter the app identifier (bundle ID).
- Enter the App Store ID and the Apple team ID.
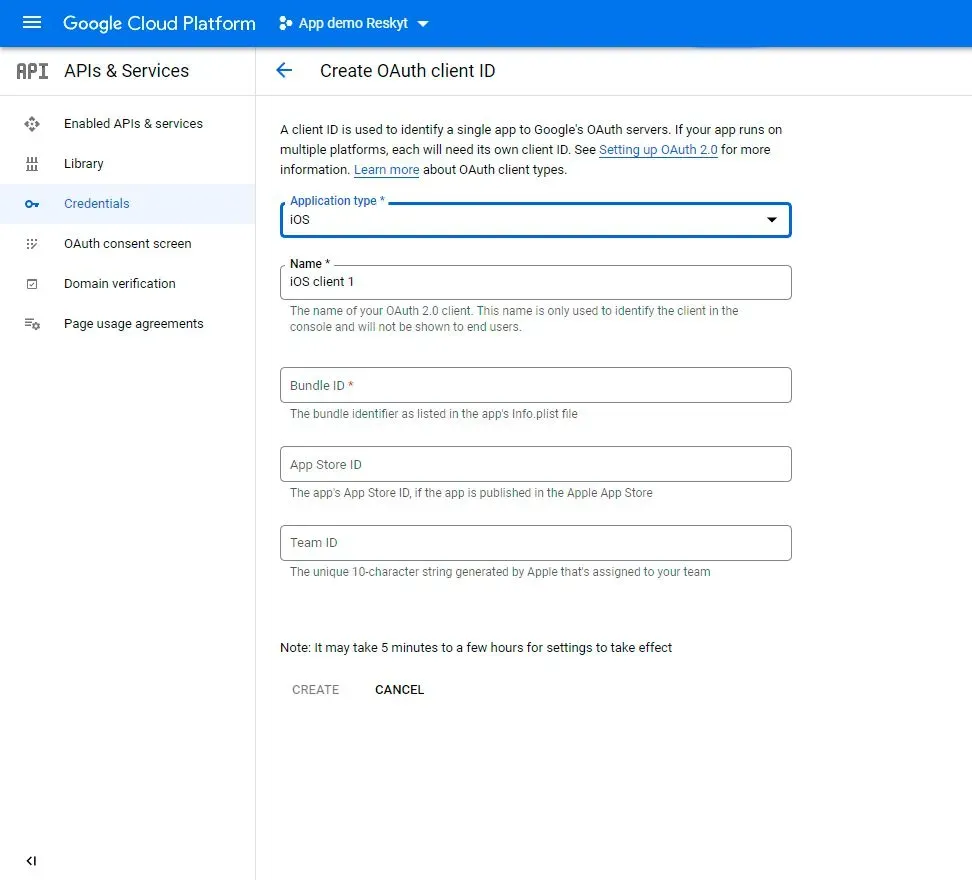
- After saving, a window shows the iOS Client ID and the iOS URL Scheme. They are the values of
Google Sign in iOS Client IDandGoogle Sign in iOS Url Scheme.
What it adds
Section titled “What it adds”Google Sign-In allows signing in with a Google account through the native Google Sign In SDK, on Android and iOS. When the authentication flow finishes, the SDK returns a token to the web page, which uses it to continue with its own authentication process.
Prerequisites
Section titled “Prerequisites”An app in the Google Cloud console, with access to the Credentials section, and the OAuth clients described above: Web application, Android and iOS.
Who does what
Section titled “Who does what”The customer obtains the data in the Google console, creates the OAuth clients and provides them to Reskyt. The developer of the customer’s website implements on the web the functions that receive the token and the error.
Reskyt carries out the configuration in the backoffice with the credentials received.
Impact on the app
Section titled “Impact on the app”Enabling Google Sign-In requires rebuilding the app and resubmitting it to the App Store and Google Play.
System permissions
Section titled “System permissions”It adds no system permissions of its own on iOS or Android. The only permission requested is Google’s, to use the user’s account for sign-in, the same one the ecommerce’s Google login already requests.
Data and privacy
Section titled “Data and privacy”Only the token returned by the SDK reaches the web. Reskyt does not store user data. No additional declaration is required in the stores.
Timeline and process
Section titled “Timeline and process”The steps, in order, are:
- Reskyt provides the customer by email with the SHA-1, the Android package name and the iOS bundle ID.
- The customer creates the Web, Android and iOS OAuth clients in the Google console and obtains the Server Key, the iOS Client ID and the iOS URL Scheme.
- The customer provides those credentials to Reskyt by email.
- Reskyt configures them in the backoffice.
- The app is rebuilt and the new version is published in the stores.
- The web developer implements the token reception functions and, if the ecommerce verifies the token, adds the Android and iOS client IDs.
- The full flow is validated.
Validation
Section titled “Validation”The web page must implement two global JavaScript functions: one receives the token when the SDK completes authentication and the other receives the error if it fails. The example below only displays the received value with an alert; in production, the first one continues with the web’s own authentication.
function rktGoogleSignInSuccess(token) {  alert(token);}
function rktGoogleSignInError(token) {  alert("ERROR" + token);}
To check that the success function is correctly declared, run this line in the browser console:
rktGoogleSignInSuccess('token')If the ecommerce verifies the integrity of the token, the IDs of the generated clients, both Android and iOS, must be added to that verification. Otherwise, the verification will fail.
If sign-in does not work, these are the checks:
| Cause | What to check |
|---|---|
| Functions not declared | That rktGoogleSignInSuccess and rktGoogleSignInError exist on the web, checking with the console line above. |
| Token verification | That, if the ecommerce verifies the token, the Android and iOS client IDs are added. |
| Incorrect Android or iOS client data | That the package name and SHA-1 of the Android client, and the bundle ID of the iOS client, match those of the published app. |
| Incorrect Server Key | That the value provided is the Client ID of the Web application client, not the Android or iOS one. |